Home
/ How To Set The Print Area In Excel - Click on the print area button in the top menu.
How To Set The Print Area In Excel - Click on the print area button in the top menu.
How To Set The Print Area In Excel - Click on the print area button in the top menu.. In the categories: section, click file. But that would make viewing the spreadsheet on the screen that much more difficult, as you would have to click between the two in order to analyze the data. Each print area prints on its own page. Each print area prints on its own page. Click the print area button and select set print area.
Each print area prints on its own page. In the wizard dialog, add the selections you want to combine into one page by clicking add button one by one. Then click the file button at the top and select print. Let's take a quick refresher on the offset function. Once set, excel would consider this print area as the part that is meant to print and would ignore the other data on the sheet.
How To Set A Print Area In Excel To Print A Specific Section from i.insider.com To set the print area here, click and drag your cursor to select only the cells containing data that you want to print. On the old toolbar, click the drop down button beside the print setup button, and you will get the set print area sooner. Select the data that you want to set as the print area; Then click next and you will see a print preview of it. For example, in order to set print area a1:n21, we can write Each print area prints on its own page. Now press ctrl + p for the print option, and a dialog box appears. Choose set print area. hit enter or return on your keyboard to set the print area.
Click the file tab > options.
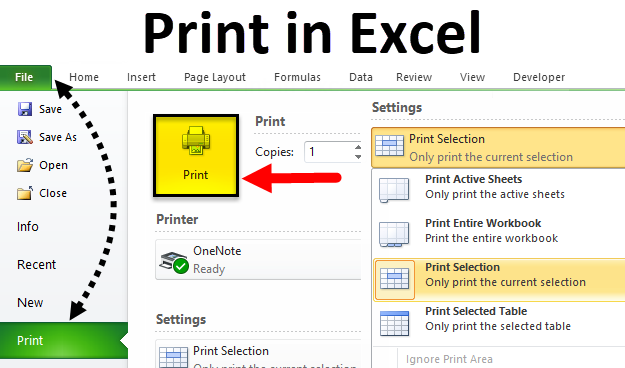
In the print layout options choose to print selection and using scaling if needed. Each print area prints on its own page. Click the page layout tab; Choose set print area. hit enter or return on your keyboard to set the print area. Let's take a quick refresher on the offset function. You can also save ink by configuring excel's fit to scaling option on the page setup window to fit all printed spreadsheet content on one page only. Using this, you can set the print area in excel worksheets, so that only that p. Print area lets you specify exactly what parts of a spreadsheet to print, and then places your selection in the upper left corner of a new page. If you need to print your work in excel, this tip would save you some papers. Select the print area in current worksheet. This looks like a printer with two lines intersecting in the upper left corner of the button. To set the print area here, click and drag your cursor to select only the cells containing data that you want to print. If you have kutools for excel installed, its set scroll area utility will help you only show a print area in current worksheet easily.
Click next, in step 2 of the wizad, check specify new print settings option, then click page setup buton, and in the page setup dialog, under page. Then, under scaling, in both of the fit to boxes, enter the number of pages (wide and tall) on which you want to print the worksheet data. Using this, you can set the print area in excel worksheets, so that only that p. The short cut key to set up the print area is alt + p + r + s. To set the print area here, click and drag your cursor to select only the cells containing data that you want to print.
Print In Excel Examples How To Set Printing Properties In Excel from cdn.educba.com Click kutools plus > printing > print multiple selection wizard. To set multiple print areas, hold down the ctrl key and click the areas you want to print. The offset function returns the reference. Click the print area button. You can also save ink by configuring excel's fit to scaling option on the page setup window to fit all printed spreadsheet content on one page only. To set more than one print area, hold down the ctrl key and select the areas you want to print. Using this, you can set the print area in excel worksheets, so that only that p. Select the part of the worksheet that you want to print.
After selecting the data range, go to page layout >>> print area >>> set print area.
Go to the page layout tab and find the page setup group. But that would make viewing the spreadsheet on the screen that much more difficult, as you would have to click between the two in order to analyze the data. The short cut key to set up the print area is alt + p + r + s. Once set, excel would consider this print area as the part that is meant to print and would ignore the other data on the sheet. In excel 2007, click microsoft office button, and then click excel options. Each print area gets a separate page. Then click the file button at the top and select print. Alternatively, press alt+p, s, p. Next, let's redefine the print area item to reference the dynprint item we just entered: In the print layout options choose to print selection and using scaling if needed. In the commands: section, click the set print area button. Print area lets you specify exactly what parts of a spreadsheet to print, and then places your selection in the upper left corner of a new page. Excel ignores manual page breaks when you use the fit to option.
Click the file tab > options. When you do this, excel will add a solid line border around the cells that you selected to print. Then click next and you will see a print preview of it. Select the data that you want to set as the print area; In the customize toolbars/menus (excel 2004 or 2008) or customize (excel v.x) window, click the commands tab.
How To Set And Change Print Area In Excel from cdn.ablebits.com Click kutools plus > printing > print multiple selection wizard. Using this, you can set the print area in excel worksheets, so that only that p. Let's take a quick refresher on the offset function. Click the print area option on the page layout tab, and in the page setup section select set print area. keep in mind that the print area will be saved once you save the workbook. To set the print area in excel, do the following: To set print area in excel spreadsheet, first select (highlight) cells that we want to set as print area, and then navigate to ribbon page layout > print area > set print area to set print area in excel vba, we have to use pagesetup.printarea property. But that would make viewing the spreadsheet on the screen that much more difficult, as you would have to click between the two in order to analyze the data. This will set up the print area.
Go to the page layout tab and find the page setup group.
Click the print area button and select set print area. Once set, excel would consider this print area as the part that is meant to print and would ignore the other data on the sheet. For example, in order to set print area a1:n21, we can write How to change a print area in excel? Select the print area in current worksheet. Click on the print area button in the top menu. In the commands: section, click the set print area button. Excel ignores manual page breaks when you use the fit to option. Click the print area button. On the old toolbar, click the drop down button beside the print setup button, and you will get the set print area sooner. You can also save ink by configuring excel's fit to scaling option on the page setup window to fit all printed spreadsheet content on one page only. Once a print area is set, add additional print areas by selecting the additional cells, clicking the print area button, and selecting add to print area. If you have kutools for excel installed, its set scroll area utility will help you only show a print area in current worksheet easily.